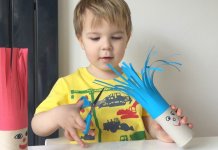
Doing a variety of paper crafts, from a simple flimsy airplane to the more ornate paper flower that Japanese origami artists are known for, is a very useful activity for children. When the essentials of the craft are mastered, kids can readily create their very own origami and other fantastic paper art forms. Here, we are exploring 6 awesome paper crafts for kids that you would like to try in their spare time.
Cool Paper Crafts Kids Will Love
The Mighty Dragon
One of the most mythical creatures of all time is the dragon. In Eastern folklore these creatures are like the pets of gods and sometimes, they are considered as gods and goddesses themselves. But no one has ever seen dragons before. The closest animals that can ever resemble a dragon, sans its wings, are the dinosaurs and the large lizards that still roam the planet. This makes it very interesting to see how kids will create their own mighty dragon from paper. On YouTube, there are a variety of how-tos related to the creation of an origami dragon. You can check out Nakashima’s easy dragon or even Shinyorigami’s creation. It may be a bit technical but with practice, even kids can create their dragons that will soar through the skies. Here, we’ll try to simplify the process for you.
What You Need:
- Origami paper in perfect square, or
- An ordinary piece of paper cut into a perfect square
Steps You’ll Take:
- Lay the square sheet or Origami sheet on a flat surface.
- Fold it diagonally in half such that it forms a triangle. To do this, bring the top corner to the bottom corner. Fold it at the center.
- Fold it again to make a smaller triangle. Place the large triangle pointing downwards and fold the left corner towards the right corner, or vice versa. Fold the center. You should now have 4 flaps.
- Open the top flap and spread it out. Make a crease on both the right and left side until you can easily flatten the flap.
- Turn the Origami square over and repeat the process in Step 4 on the flap.
- Repeat Step 4 on the remaining flaps.
- Let the left flap stand upright or vertically. Slowly open it and squash down until it is flattened against the rest of the flaps.
- Fold the topmost layers of both sides of the flaps towards the center.
- Fold the topmost triangle down.
- Unfold both sides including the top.
- Create a petal fold by lifting the top layer all the way up from the bottom layer. Make sure to fold in the sides of the petal fold along the crease.
- Turn the paper over.
- Repeat Steps 7 to 11.
- Make an inside reverse fold by opening the left side of the figure. Flatten this down to make the dragon’s head.
- Fold the tip of the dragon’s head before unfolding it.
- Hold the dragon’s “neck” with one hand while pushing its “jaw” towards the neck using your other hand. Flatten the figure once you have achieved a certain effect.
- Fold the tip of the dragon’s head backwards and unfold.
- Open the head and fold the tip well back at the crease before flattening it.
- Fold in the sides of the “neck” to make it appear thinner.
- Make an inside reverse fold on the bottom right flap. Extend this all the way out to make the tail.
- Open the dragon’s tail and fold the tip up.
- Leave a small crimp by folding most of the dragon’s tail back out.
- Close the tail again.
- Fold in the sides of the tail to make it look thinner.
- Fold the remaining upright triangle down to form the dragon’s wings. The tip of the wing should be in line with the triangle formed by the head and tail of the dragon. Unfold.
- Open the wing’s left flap. Fold the entire wing down and tuck this inside the loose flap before finally closing the loose flap over the dragon’s wing.
- Fold the loose flap of the wing towards the left.
- Open the wing and then fold it along the right and left corners.
- Push the wing’s right side until it pops in. You can use your thumb for this.
- Re-crease the wing’s left side all the way from the left corner to the colored side.
- Repeat Steps 25 to 30.
- Open the dragon’s wings and let it fly.
There are different types of dragons that you can make. It usually takes a lot of folding and creasing. But, once you get the general pattern, it will be quite difficult to stop.
The Easy Spy Plane
In the ongoing war on terrorism, unmanned aerial vehicles are the eyes and ears of the military, able to pinpoint the exact location of the enemy and even eavesdrop on certain targets of interest. For many of us, we call these drones as spy planes. Making a paper airplane is quite easy. Making a paper spy plane is also easy. JustOrigami provides a very easy instructional video on how you can make such an easy gliding spy plane. If it’s speed that you want, you may have to check out the video of smilo75. Here’s how.
What You Need:
- A regular typewriting (8.5 x 11 inches) paper
Steps You’ll Take:
- Lay the paper out in a vertical position then fold the left side towards the right side in half.
- Unfold the paper and begin folding the bottom about an inch upwards. Continue making 1-inch folds until you make 7 folds
- Reposition the paper so that the folds are located on top.
- Flip the paper to the other side.
- Fold the left side towards the right side.
- Create a crease about an inch or so from the left. To make the wing, fold the right side directly over to the left side.
- Flip the paper again and fold the left side directly towards the right, making sure it lines up well with the other wing.
- Measure about a thumb’s width on the tip or edge of the wing and fold this to serve as its fin.
- Flip the figure again.
- Repeat Step 8 on this side making sure they align perfectly well.
- Unfold the plane. Tilt the wings up a bit. Straighten the fins.
- Let it fly.
It may not look a very sophisticated airplane but it sure can fly. The large surface area of its wings allows it to fly over greater distances than the delta shaped wings of traditional paper airplanes. Plus, it’s so easy to make.
The Easter Bunny
One of the animals most beloved by young kids is bunnies and rabbits. And while we cannot really promise you to be able to create a Roger Rabbit or even a Bugs Bunny, we sure can show you a fantastic way to make your own lovely rabbit, perfect for Easter. Red Ted Art provides a great, easy-to-follow video on YouTube that even preschoolers will have no problems making.
What You Need:
- A square sheet of Origami paper, or
- Any square sheet of paper (you can also choose colored or patterned paper)
- Permanent marker
Steps You’ll Take:
- Place the paper diagonally with the pointed corners pointing up and down and left and right.
- Pick the bottom corner and fold it towards the top corner.
- Pick the left corner and fold it towards the right corner. Unfold.
- Fold about an inch from the base of the triangle.
- Pick the right and left bottom edges of the triangle and fold it at the center, keeping it in alignment to the center crease to form the bunny’s ears.
- Flip the figure over.
- Pick the top corner of the bunny’s head and fold it downwards.
- Pick the bottom corner and fold it towards the back.
- Get a permanent marker and draw the bunny’s facial features like the eyes, the nose, and of course, the mouth.
There are a variety of ways in which you can actually elevate this very simple Easter Bunny. Technically, it’s just the bunny’s face that you’re making. You can then add a body made of the tubes from your rolls of toilet paper. Or, you can simply make a rod attachment at the back.
Easy Flying Helicopter
Most of the paper crafts that you will see both online and on various craft books are intended for display or decorative purposes. However, there are also those that serve as toys for kids. And while we already featured the venerable spy plane in our list, maybe you’d be interested in teaching your kid how to make his or her own helicopter. This is actually not an origami art as it involves some form of cutting. Strict origami creations do not involve any form of cutting, only folding. Nevertheless, we thought it quite amazing for kids to learn this craft since they can easily make an improvised flying helicopter with just a strip of paper. Here’s how.
What You Need:
- A small rectangular piece of paper about 3 inches long and 1 inch wide
- A pair of scissor
- Paper clip or adhesive tape
Steps You’ll Take:
- Create a flap that will serve as your helicopter’s rotor blades. To do this, cut the rectangle in the center and right towards in the middle.
- Fold one of these flaps down.
- Fold the other flap down but towards the other side. The idea is for you to get a flap facing on opposite sides.
- Now, angle the flaps at 90 degrees or perpendicular to the rectangular strip.
- Cut horizontally about a third of the width of the rectangle and about a quarter just below the rotor blades. Do the same on the opposite side leaving a third of the width of the rectangle in the middle.
- Fold one side towards the center and do the same for the other side.
- Get a paper clip and fasten the two folds together. Alternatively, you can secure the two folds together using an adhesive tape.
- You can add more tape if the rotor base is not heavy enough to allow for optimum rotation.
The idea is to toss the paper helicopter into the air and just watch it rotate and glide towards the ground. Alternatively, you can stand on higher ground and simply drop the helo. If the helo is not spinning, you can add some more weight at the base of the rotors. It is one of the easiest yet equally fun ways to do something with paper. Kids can also experiment with a variety of colorful patterns. They can also experiment with blade shapes and sizes to come up with the best performing helicopter.
The Jumping Frog
One of the most fascinating and truly awesome paper crafts your child can make is the jumping frog. This is no Kermit or Kero but it sure can go leaps and bounds. Making it is not really that difficult as the folds are quite easy to follow as shown in the YouTube videos of Fringe Hobby Channel and Proud Paper Official. The thing is, once your kid is done making one of these jumping amphibians, he or she will be inclined to make some more to race with his or her friends. Now that is one sure way to help them get more active especially during spring and summer. To start off with your jumping frog project, you will definitely need the following.
What You Need:
- Square sheet of Origami paper, or
- Any sheet of paper as long as you are going to cut it into a perfect square
- Permanent marker or any drawing instrument
Steps You’ll Take:
- Take the left side of the square and fold it towards the right side to produce a rectangular shape.
- From the folded section of the paper, fold it to form a triangle with the tip of the triangle on the right side the paper. It should create a sharp point at the top right corner. Unfold.
- Do the same on the right side of the rectangle, forming a sharp point at the left side. Unfold.
- You should get an X crease in the process.
- Pick the top edge of the paper and fold it downwards, making sure that the creases will meet exactly at the center of the imaginary X. Unfold.
- Form a triangle by tucking the side of the paper towards the center and in between the two folds, using the creases as your guide. Do this on the other side as well.
- Pick the bottom edge of the rectangle and fold it towards the edge of the base of the triangle. You should have the shape of a house. Unfold.
- Pick the left and right corners of the base triangle and fold these up at a 45 degree angle. You should see a Decepticon logo. This serves as the front legs of your jumping frog.
- Pick the two sides of the base rectangle and fold these towards the center.
- Repeat Step 7.
- Pick the right and left corners of the folded rectangle and fold these down towards the center. These will form the legs.
- Gently open the legs. Spread the insides until such time that the form resembles that of the outer legs. Fold these up and then form a crease.
- Follow the same procedure in Step 8 on the resulting figure from Step 12. This forms the hind legs of the jumping frog.
- Fold the hind legs of your frog to form a crease at the level of the center of the X where the frog’s front and hind legs meet.
- Pick the hind legs and fold it in half to form the frog’s spring mechanism.
- Get your drawing instruments and draw the frog’s eyes and other adornments such as body spots. You now have your jumping frog.
Playing with the jumping frog is quite easy. Simply place it on a flat surface and flick its rear to give it a boost forward. The springing action actually depends on how well you folded the hind legs. Kids can race with other kids with this jumping frog.
The Beautiful Butterfly
For largely decorative purposes we strongly recommend trying out making a beautiful butterfly as shown by Innova Crafts in their YouTube video. Technically, the paper butterfly is best used as a plaything as kids can really make its wings flap like the real thing. If you are going to use it as a decorative item, you can try fastening the ends of the butterfly body to keep them taut. The good thing about this particular project is that it also encourages children to be as creative in their finishing touches to the butterfly. This should come in handy if we want kids to really use their creativity in coming up with really awesome butterfies.
What You Need:
- Square Origami paper, or
- Any sheet of paper that you can cut into a perfect square
- Coloring tools
Steps You’ll Take:
- Take the bottom part of the square and fold it towards the top section. Unfold.
- Take the top edge and fold it towards the center crease. Do the same for the bottom section.
- Take the corner of the upper half and fold it towards the center horizontal crease. Do the same for the rest of the corners.
- Take the upper section and fold it towards the bottom, making sure all the folded creases are tucked inside.
- Take the bottom half of the figure and fold it at the center and towards the top half. Make a crease only at the center of the fold, about an inch wide.
- Turn the figure over.
- Place your finger right in the center of the figure. Wrap the paper around your finger to form a loop. Once the loop has been created, you can carefully slide your finger out.
- Poke the center bottom section of the loop using your fingernail.
- Grab the loop on both ends to pinch them together. Pinching and releasing the loop’s ends will make the butterfly wings flap.
- Get your coloring tools and paint or apply colorful patterns on the “wings” of your butterfly.
The flying butterfly doesn’t really fly. However, it does make for a great and productive time for kids during spring and summer break. At any rate, since the angle of the flapping wings are inherently dependent on how much tension is applied on both ends of the loop, then kids can create fantastic fluttering effects simply by adjusting the tension applied in different models. He or she can then fasten these with a string or some other mechanism to sustain the tension.
Paper Crafts for Kids
Encouraging children to try their hands on a few of the hundreds of paper craft projects can help them a lot in their development. It helps them follow instructions as many of these projects require understanding and comprehension of written instruction as well as the ability to perform specific actions based on what is demonstrated on an instructional video. The mere performance of these crafts requires deftness which is largely predicated on the control of one’s fine motor skills as well as the soundness of his or her visual motor coordination. Perhaps more importantly is the benefit of such activities in the enhancement of children’s creativity and imaginative potentials. Completing a project is one thing. Applying customizations or finishing touches will require absolute creativity. As we already know, creativity espouses problem solving skills and other cognitive processes that will be very useful later in life. Of course, the emotional and psychological benefits of paper craft activities are simply phenomenal.

