Science experiments are not just for school. Of course, children need an adult supervising them at all times, but this can be facilitated by parents as well. Even if you are not a scientist or if you were not very good in science as a kid, this does not mean you cannot introduce these activities to your young ones. BornCute.com are proud to present 5 insanely cool science experiments for kids.
The Soda-Fueled Skateboard
One of the most popular science experiments out there is the Mentos-and-Coke one, and this is one of the many variations of this specific one.
What You Need
A small skateboard
Mentos
Bottle of Coca Cola
Roll of tape
What To Do
First, tape the bottle of Coke to the skateboard. Make sure that the bottle is securely attached so that it will not easily detach from the skateboard.
Second, make a small hole in the bottle cap of the Coke. The wrapper of your Mentos can be designed as the loading mechanism, by putting the candies in the middle and wrapping the paper around it. Secure one side with tape and just twist the other side.
Third, bring everything outside where you can launch your skateboard. Out on the pavement is much better because it will also get wet during the experiment. With the bottle (and skateboard) upright, insert the “loading mechanism” with the Mentos inside, close the bottle and let the skateboard down. Watch it go! You can even have little racing competitions with friends!
The Science Behind It
The Mentos reacts with the carbon dioxide present in the Coca Cola. Once the bottle is opened, this carbon dioxide is trying to come out after being released from the pressure of the bottle. The candies have little pits in their surface that create nucleation points, where bubbles are formed. They will all be looking to escape the bottle, and when they do through the little hole, this pressure will move the skateboard.
Tornado In A Jar
Science experiments can really be so simple and yet be impressive. This experiment needs only 2 ingredients, both easily available at home and needs only 5 minutes to do.
What You Need
A mason jar
3 cups of water
1 tsp of dishwashing soap
1 tsp of vinegar
What To Do
First, fill your mason jar with water, leaving about one inch of space on top. Then pour the soap and vinegar into the water, then close the jar. Make sure you check the cap of the mason jar beforehand so that it won’t explode and leave a huge mess.
Next, hold the mason jar with both hands, one at the top and one at the bottom. Swirl it for around 5 seconds and put it down. Sit and watch your own homemade tornado! You can also add glitter to make it more impressive.
The Science Behind It
Spinning the water in your mason jar creates a vortex in the middle. Centripetal force is the main reason why the water spins around this vortex. This is how a mini tornado is created. Real hurricanes are similar because they also have a vortex.
Homemade Volcano
There are very few things more impressive to kids than a volcano. It erupts and lava flows down. Of course, the real volcano is much more terrifying and dangerous. Still, a homemade volcano is a great way to teach your kids how they work and how chemicals react with each other.
What You Need
6 c flour
2 c salt
4 Tbsp cooking oil
Warm water
A plastic bottle
Dishwashing soap
Food color
Vinegar
Baking dish or pan
2 Tbsp baking soda
What To Do
First, you need to create your volcano. Prepare your dough by mixing the flour, salt, cooking oil and water. You will end up with a mixture that is firm but smooth, but if needed, you may add more water. Make the bottle stand in the baking pan and mold your dough around it, making it look like a volcano. Just make sure you do not cover the hole of the bottle or drop some dough inside.
Second, fill the bottle with warm water and a bit of red food color until it is almost full. Then, add 6 drops of the dishwashing soap into the bottle, this will trap bubbles that will come out of the reaction and give you better lava.
Next, add the baking soda to the liquid before pouring the vinegar carefully into the bottle. Watch out because your volcano will erupt soon!
The Science Behind It
The baking soda and vinegar react with each other, producing the red lava of your volcano. They also are responsible for creating carbon dioxide gas, much like in real volcanoes. Pressure starts to build up inside the bottle, making the lava and the gas bubbles stream out of the volcano, much like in real ones. You can experiment with the food color you use so that you get impressive and real-life lava.
Invisible Ink
This experiment is great to try out with kids so that they can eventually create secret messages for you, siblings or friends. Even reading the messages can be exciting, so start thinking of what to write! You can make it more exciting by designing a game where they have to find and decode your messages to find a hidden treasure.
What You Need
Baking soda
Paper
Water
A heat source like a light bulb
Paintbrush or cotton swab
Measuring cup
Purple grape juice (optional)
What To Do
First, create your invisible ink by mixing equal parts of water and baking soda.
Second, make your secret messages on a white paper using a paintbrush or a cotton swab and your ink.
To read the invisible ink, there are two approaches you can take. First is to hold the paper up to any heat source, like a light bulb. You may even warm it up using a flat iron. The baking soda will then make the writing brown. The second way is to paint over the whole paper with purple grape juice. This will make the writing appear in another color.
The Science Behind It
The baking soda solution will disrupt cellulose fibers in the paper and will damage its surface. When the paper is heated, the fibers that are shorter and exposed become darker and will burn before the other parts of the paper that were undamaged.
However, using the heat method is riskier because you might end up igniting the paper. In the second method, the grape juice works as the pH indicator that will react to the base, in this case, the sodium bicarbonate present in soda. The reaction will make the colors in the paper change. For a better effect, use grape juice concentrate instead of regular grape juice.
Egg In A Bottle
This is a very impressive demo that you can do with the kids to understand some chemistry and physics concepts. There are three ways of doing this experiment.
What You Need
A hard-boiled egg that has been peeled
Jar or bottle with an opening that is a little bit smaller than your egg’s diameter
Very hot water or very cold liquid; a paper and a lighter can also be used
What To Do
Method 1: Light a piece of paper and put it inside the bottle. Put the egg on top (small side at the bottom). Once the flame goes out, the egg will be sucked inside.
Method 2: Put the egg on top of the bottle then run it under very hot water. Warm air will escape around the egg. Put the bottle down on a counter and as it cools down, the egg will be pushed into the bottle.
Method 3: Set the egg on top and immerse the bottle in very cold liquid, like ice water. As the air inside the bottle becomes cooler, the egg is then pushed inside.
The Science Behind It
When heat is applied to the bottle, it increases the pressure of the air, making the egg seem like it will jump out of the bottle. However, as the air inside cools down, it starts to reduce the air pressure inside. Once the temperatures inside and outside match, the pressure outside the bottle will force the egg inside.
On the other hand, when cold is applied, the egg is pushed in because of the lower pressure inside the bottle. Once it goes down enough, the egg is pushed inside by the air pressure outside the bottle.
Advantages Of Trying It Out At Home
Why should you even consider doing it at home? After all, they will eventually go to school and experience this with their qualified science teachers. This is not reason, though, to wait that long. Here are some reasons why you should incorporate science in your young child’s life:
They are curious
As soon as they start talking and understanding a bit how the world works, they will begin peppering you with questions about how things work. You will surely get sick and tired of hearing them say “Why?” Their curiosity is a great reason why you should start doing even simple science experiments with them. They want to learn about the world and why things happen the way they do. You will for sure get their full attention and interest because they can explore themselves what happens when they put together specific household items.
You can get them interested in science at a young age
They do not have to become doctors in the future, but getting them interested in science will help them in life. Learning the scientific process of experimentation, trying out different things and performing structured tests will teach them critical thinking, observation, and other important skills that they can use for the rest of their lives. If you also instill in them a love of science, you might, in fact, be raising the person that will one day make a breakthrough in medicine research.
It is easy and fun
In school, there are specific items you need for a controlled study but simple experiments for home do not need them. Some of them will make use of items you normally have around the house. Using these daily things will also pique their interest and creativity, as they learn that ordinary does not mean boring.
Most of these experiments have a wow factor that will surely impress kids. Learning, after all, can be fun. Forget the idea that the sciences are uninteresting and show them how cool it really is.
Important Tips And Safety Reminders
If you are ready to start turning your home into a little science lab, below are some simple experiments you can start with. Make sure that you read the instructions a few times to be familiar enough before doing it, and consider your child’s age.
Some might be too advanced for them to understand, or some might not be appropriate for them to do. To make it effective, you can also do a bit more research on the science behind the experiments, so you can explain what happened afterward. There are also websites that can help you teach these concepts in simple terms so that kids can understand them.
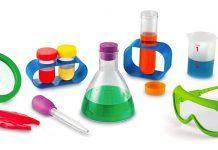
To make sure that no one is blowing up the house and that experiments are done safely, stress that they are only allowed to do this with your supervision and never alone with their friends. Moreover, be careful with items that should not be left with children. Keep them out of reach and put them away as soon as the activity is finished. If needed, use safety equipment like goggles, gloves, and even covers for your tables (no one wants a hole in the dining table).
Conclusion
These are just some experiments that you can start at home to introduce your kids to the wonderful world of science. If you enjoyed doing them and the kids loved it, there are lots more out there you can try out. So have fun experimenting!
You can find some great science toys by clicking here.

