13 Radical Science Experiments for Your Little Einstein

If you’re looking for something to do with your kid that’s both fun and educational—you might want to try doing some at home science experiments. It might not have crossed your mind, but doing science projects at home can be just as enjoyable and valuable as doing some arts and crafts (which is always a popular choice for at home activities).
Many parents don’t really think about the fun to be had with doing science experiments for kids; we typically think of science experiments as an activity that takes place strictly at school. But, science projects don’t necessarily have to be confined to your child’s school science fair (although you’re definitely going to have conduct a science experiment whether you and your kid want to or not at that point); science projects can also just be just another entertaining activity that you can do with your child that allows the both of you to bond while learning all about the inner workings of this magical world. Let’s go ahead and take a look at a wide number of science projects you can try at home with your kid.
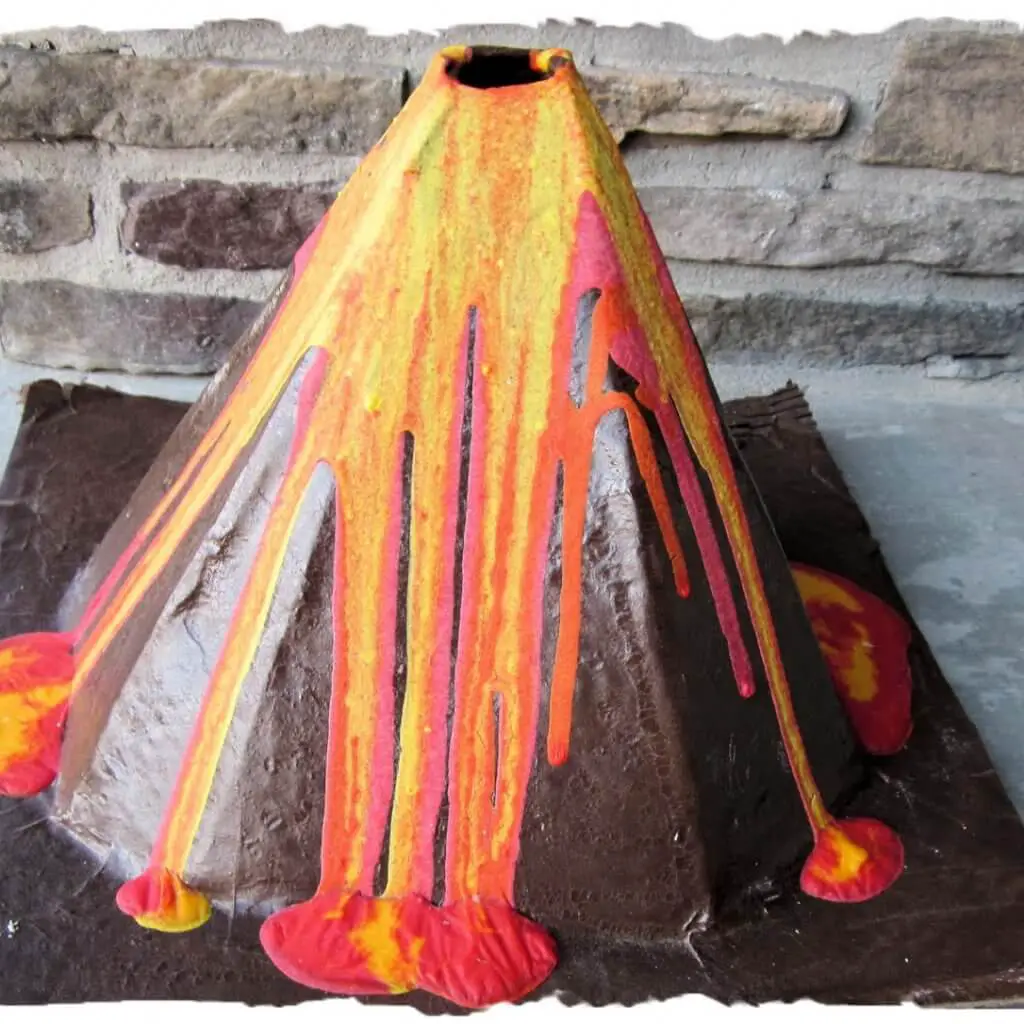
Volcano
The volcano is an absolute classic, and it’s probably the first one that comes to mind when you think about science experiments for kids. Everyone gets a kick out of seeing that volcano bubble over at the time of eruption—and in addition to being fun—you’ll also learn a lesson about simple chemical reactions.
You can make your volcano in two ways: The first way, you can use less materials (without making a volcano itself) to basically see how the chemical reaction works. If you want to make an actual volcano, you’ll just need some clay and an empty mason jar in addition to the basic materials. The volcano gets pretty messy, so you’ll probably want to let it erupt outside.
Here’s what you’ll need for the first option:
- Two 2-liter plastic bottle (something along the lines of a water of soda bottle; it’s your choice).
- 400 ml of white vinegar
- 10 ml of dish soap
- 100 ml of water (make sure the water is nice and cold)
- Some food coloring (whatever color you choose is up to you)
- ½ cup of baking soda
The directions are super simple: First, you’ll need to make your baking soda slurry. You’ll just combine all your ingredients together in one of the bottles and mix thoroughly with a spoon until the mixture is completely liquid. Pour your mixture into the other bottle, back of quickly, and let it erupt.
If you want to have a bit more realistic of a volcano (meaning you make the clay volcano) you’ll need to make use of 2 packets of air drying clay and an empty jar.
What you do is take your clay and spread it out over the cake board. Then place your empty jar on the middle of the board. Use some of your clay to make sausage like shapes and you can go ahead and wrap the clay around the jar, moving upwards until the jar is covered at the rim. If you’d like, you can paint the volcano with any colors you please.
Once you have the volcano built, go ahead and add the same ingredients that you did using the plastic bottles; the eruption results will be the same.
This experiment basically shows you how the gas carbon dioxide is made. The chemical reaction of the baking soda and vinegar is what works together to form the gas.
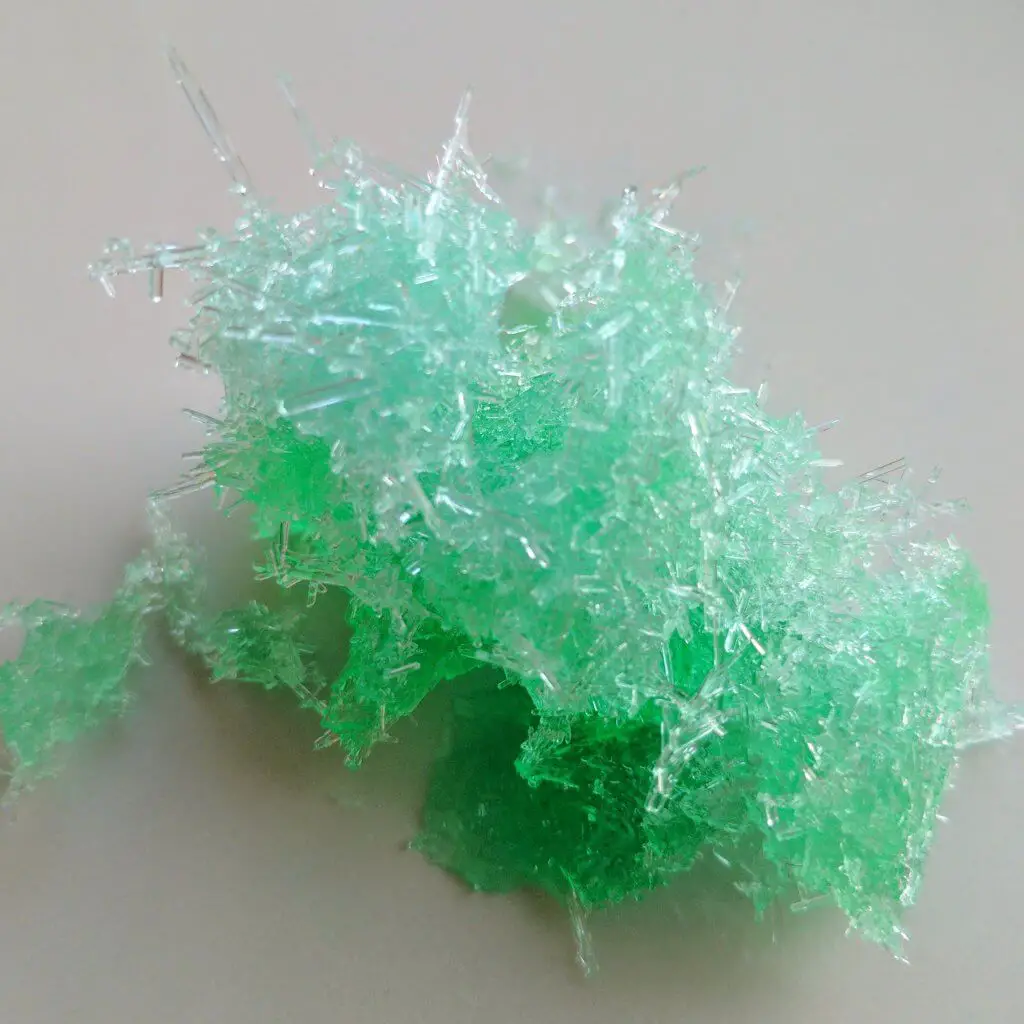
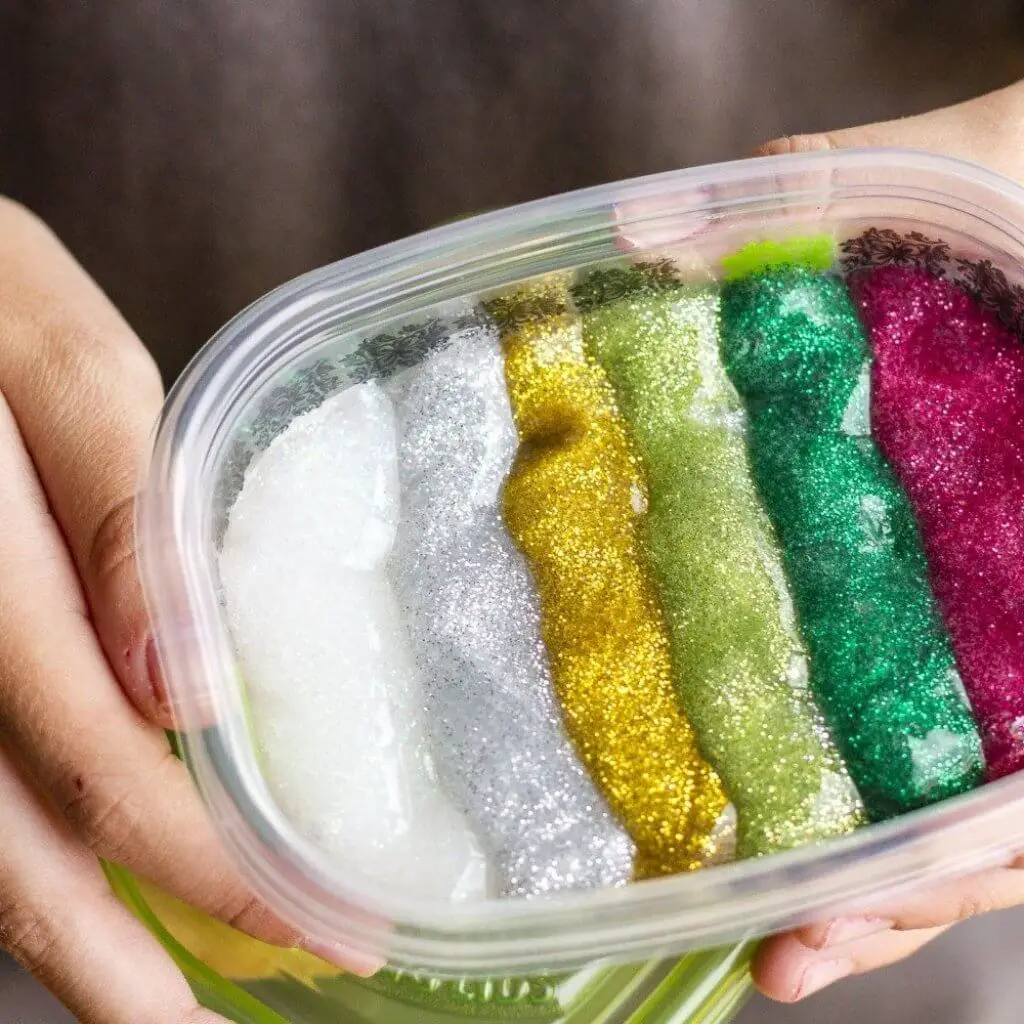
Salt crystal feathers
Aside from the lesson to be learned about evaporation, salt crystal feathers just look really cool.
Here’s a list of the needed materials:
- One regular size box of salt (which will make up to three feathers)
- Three mason jars
- Clothespins
- Faux feathers
To begin, you’re going to want to make your salt crystal water. First, fill up your mason jar with water, then pour the water into a pot and add your salt. Then, boil the water until your salt dissolves. You’ll want to continue adding salt until a layer of crystallized salt is formed on top of the boiling water (the layer should resemble ice).
Next comes the formation of the crystals. Once you have the salt water, go ahead and pour it into your mason jar. Then, grab the tip of your feather with the clothespin (you’ll be sort of hanging the feather in the jar filled with salt water using the clothespin). Then, place the feather in the jar, and let it sit with the tip of the feather sticking out of the top of the jar as it’s suspended by the clothespin.
Once you have your feather inside the jar, place the jar in front of a window where the jar and feather can get plenty of sun. The crystals will begin to form in only a couple of hours, but you might want to leave the jar in the window for a couple of days to get the most crystal-like results. Whenever you’re ready, take the crystals out of the water and let them dry overnight. This project is one that takes a little bit of time, but looking at those beautiful feather crystals in awe is totally worth the wait.
Lava lamp
Making a lava lamp at home is a great way for your kid to learn about the concept of the density of different substances—plus they look really neat.
You’ll need these materials:
- An Empty plastic water bottle
- Water
- Food coloring
- Alka-Seltzer tablets
- Oil
Begin by filling the water bottle with oil (you should fill it up a little more than halfway). After that, pour water into the remainder of the bottle. You’ll then add 10 drops of food coloring. Next, break the Alka-Seltzer tablet into four separate pieces. Drop each piece of Alka-Seltzer into the water/oil/food coloring mixture one after the other (wait till the mixture bubbles up before putting in each subsequent tablet). All you have to do then is sit back and enjoy, while you watch all the colored bubbles swirling around the bottle.

Slime
What kid doesn’t like slime? As far as making your own slime goes, it’s going to (obviously) be very messy, but it’s super quick (only 10 minutes) and fun.
Here’s what you’ll need:
- Water
- A measuring spoon
- Some white wood glues
- Food coloring of your choice
- Borax powder
- Two plastic containers
- An airtight container for slime storage
Pour a tablespoon of water and add a tablespoon of glue into one of your containers. Then, add a drop of food coloring and stir everything together. In your second container, combine a tablespoon of water with a tablespoon of the borax powder. You’ll need to stir the mixture together until the borax powder dissolves; this makes borax solution. Next, pour the borax solution into the glue mixture in the other container. From there, you can go ahead and mix the solutions together—with your hands if you’d like—and then you’ll have a bunch gooey slime.
Once you’ve made your slime, you’ll want to store it in the airtight container to ensure no mold grows.
One thing to note, is that borax powder is poisonous, so make sure you wash your hands afterwards (it’s messy so you’ll probably be washing your hands regardless).
When you and your kid make slime, what you’re doing is creating a material known as a polymer. A polymer is essentially a type of liquid that doesn’t flow; or you can see it as a liquid that basically contains qualities of a solid. Other examples of polymers include Jell-O, rubber bands, and gum.
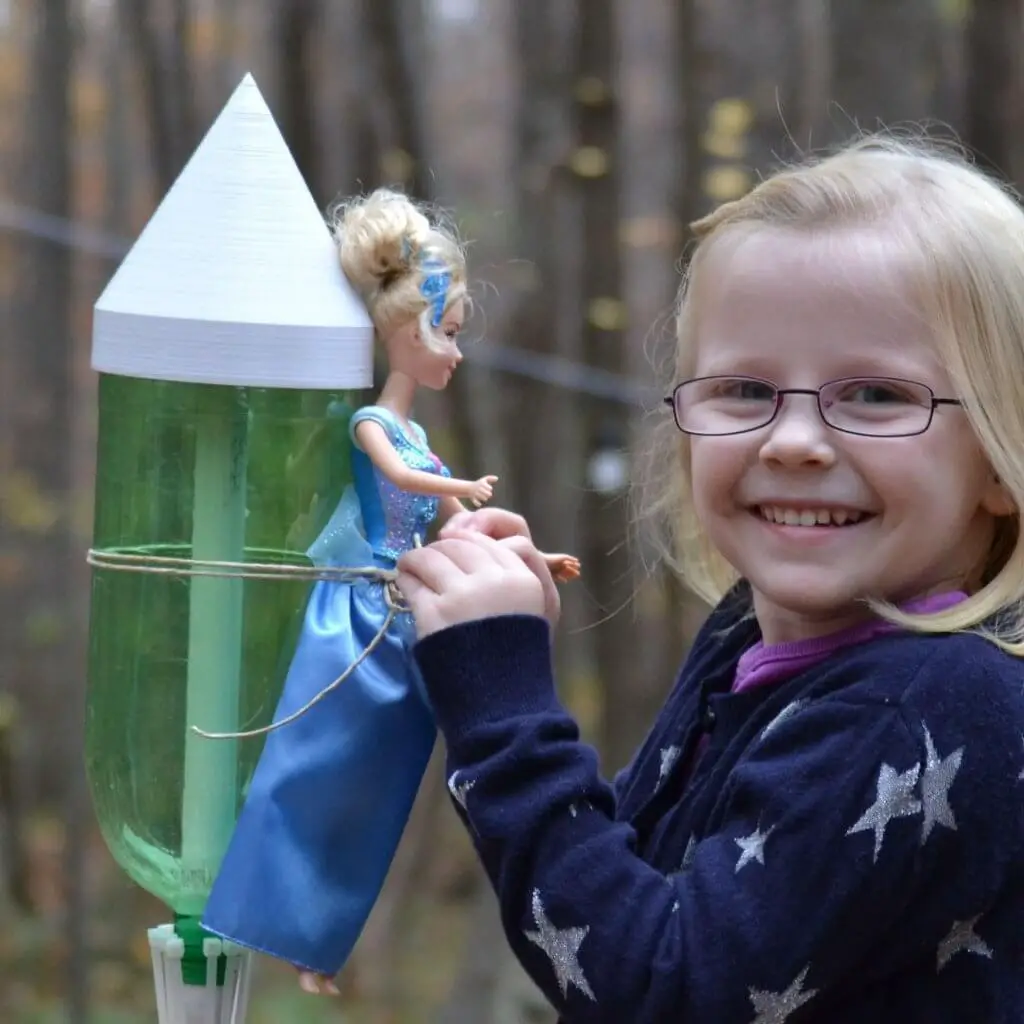
Film canister rocket
Film canister rockets are literally a blast, and they give you and your kid the opportunity to learn a little bit about rocket science and chemistry.
The rocket is a super simple project and you’ll need the following materials:
- Alka-Seltzer tablets
- Water
- A plastic bottle that has a snap top
- Cardboard and tape for fins (optional)
Fill up your bottle with water, add an Alka-Seltzer tablet (make sure to leave ½ inch of space at the top of the bottle), close the cap tightly and quickly, step back and watch the rocket soar. Your rocket isn’t exactly going to blast off into the great beyond, but you’ll still get a cool explosion nonetheless. You can add some more Alka-Seltzer if you didn’t get the level explosion you wanted.
You’re essentially learning the same lesson that you’ll learn if you choose to go the volcano route. The Alka-Seltzer is basically baking soda, and when it mixes with water it creates carbon dioxide gas; the carbon dioxide gas is what’s responsible for the explosion due to the built-up pressure of the gas.
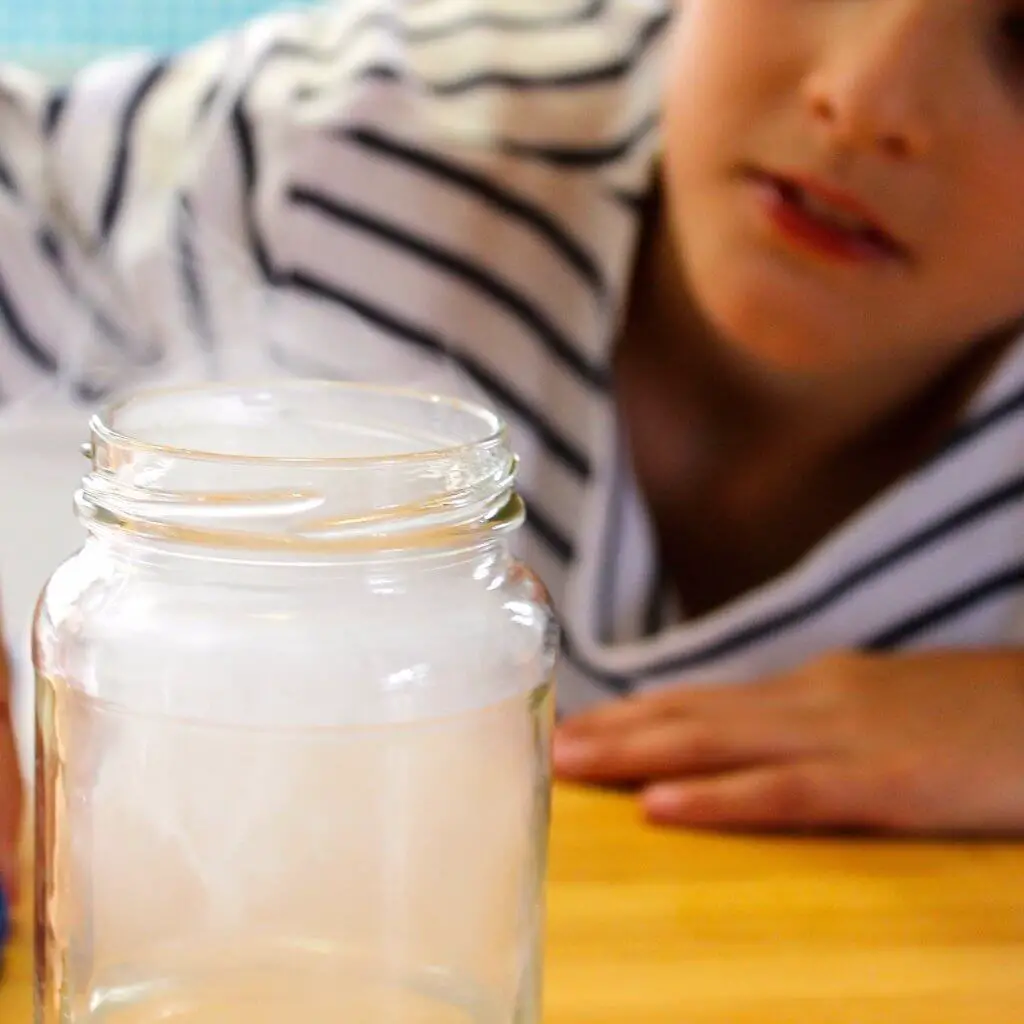
Cloud in a jar
Speaking of rockets, there’s other science experiments that allow you and your kid to fly high and soar into the clouds. With the cloud jar experiment, you and your child will learn about the process by which clouds hold water, and can no longer hold the water once the cloud becomes too heavy (producing rain).
The supplies are minimal and are as follows:
- Water
- A clear jar or vase or glass
- Shaving cream foam
- Food coloring
- Eyedropper
Fill the jar up with water, leave a little bit of space, and then put your shaving foam on top of the water. The shaving foam is the cloud in this experiment. You’ll then drop the food coloring on top of the shaving cream, and watch the food coloring trickle down into the water. At first the food coloring will stay in the shaving cream for a bit, but once the food coloring gets too heavy for the foam, it’ll fall into the water just like rain would fall from a cloud when it’s no longer able to hold the weight of the water.
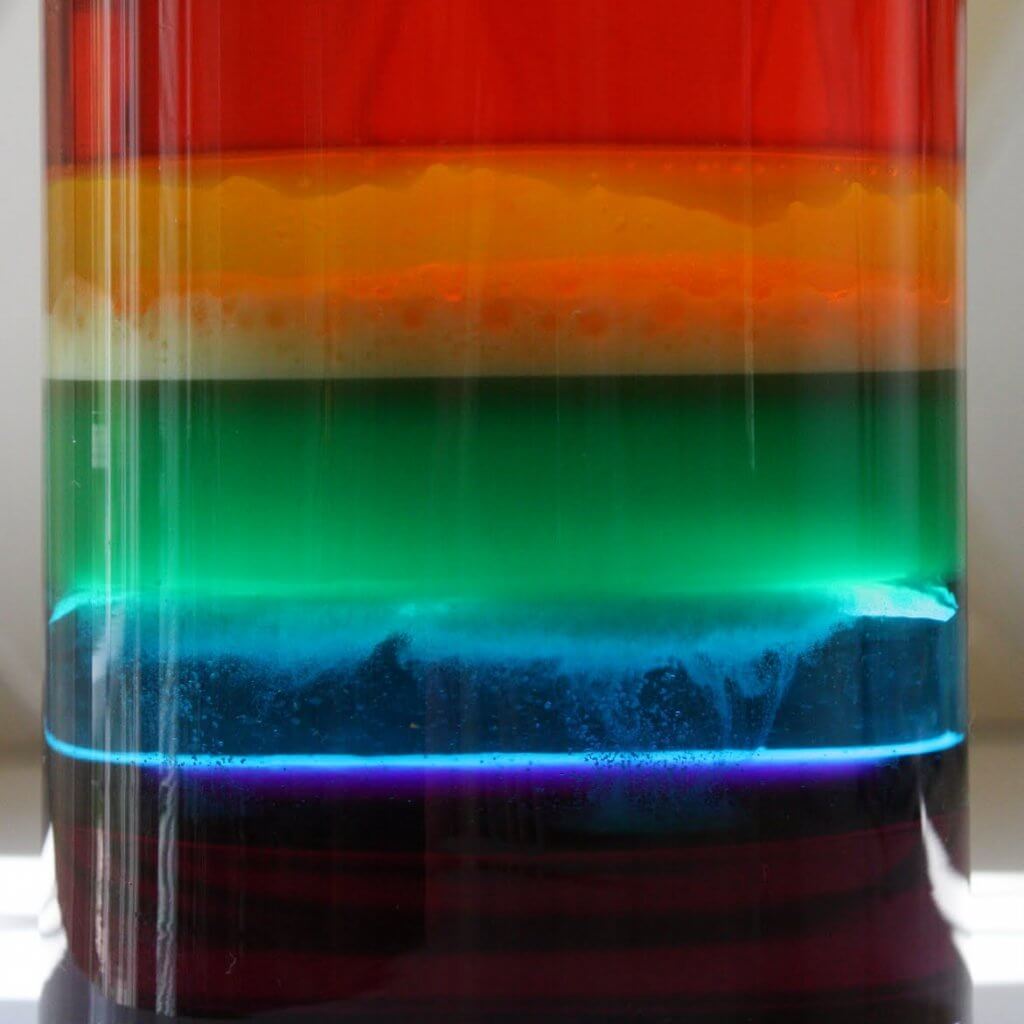
Rainbow in a cup
It’s always a beautiful sight to see a rainbow after a torrential downpour, which means making a rainbow in a cup is a great experiment to try following the cloud in a jar. This experiment will teach your kid about water density.
You’ll need these materials:
- Some food coloring (at least four colors)
- Four plastic, clear cups or glasses
- Plastic test tube
- Four eyedroppers
- Granulated sugar
- Water
Start out by simply filling the cups with eight ounces of water each. Then, you’ll want to add two tablespoons of granulated sugar to the first cup, four tables of granulated sugar to the second cup, six tablespoons of granulated sugar to the third cup, and eight tablespoons of granulated sugar in the fourth cup. Next, put a different color of food coloring into each cup. Make sure reach cup of sugar water has only one color.
You will then stir each cup until the sugar in every cup has dissolved completely. Eventually, you’re going to hit a point where the sugar can no longer dissolve. This means you’ll need to make a supersaturated solution which can made simply by just putting the cup in the microwave for about twenty seconds and then try stirring again.
Now it’s time to make all the colors of the rainbow by transferring the water in each cup to the test tube. You’ll begin with whichever color water had the most sugar in it before it was dissolved. Slowly use the eyedropper in order to add the bottom layer of the sugar water to the test tube.
Continue to add the other colors one at a time, according to the water’s original sugar level going from the largest amount to the smallest. You want the densest amount of sugar water on the bottom with the least dense amount of sugar water on top (the amount of sugar originally used is what determines the density).
You’ll want to use a separate eyedropper for each color, and you’re going to want to add layers slowly or else the colors will get all mixed up—and you won’t get the appearance of the rainbow. The lesson here is about water density, and if different sugary water solutions aren’t evenly layered, your child isn’t going to understand the lesson. Make sure you explain to your child that the different levels of density were created using different amounts of sugar.
Lightning in a bottle
Here’s another shockingly easy experiment you can conduct at home (maybe you aren’t so shocked at this point as to how effortless all these experiments are).
Here’s what you’ll need to get the spark going in a flash:
- Aluminum foil
- A dryer sheet
- A blown-up balloon
- Some thumbtacks
- A glass jar
You’ll start out by putting the aluminum foil in the bottom of your glass jar. Then, place your dryer sheet on top of the jar, and poke holes in the dryer sheet using your thumb tacks. After that, screw on the top of the jar. With the next step, you have to literally use your head by rubbing the balloon on your hair; this creates static electricity. Place the balloon on top of the jar, and you get lightning in a bottle. If you want to get an even cooler effect, turn the lights out once you place the balloon on the jar.
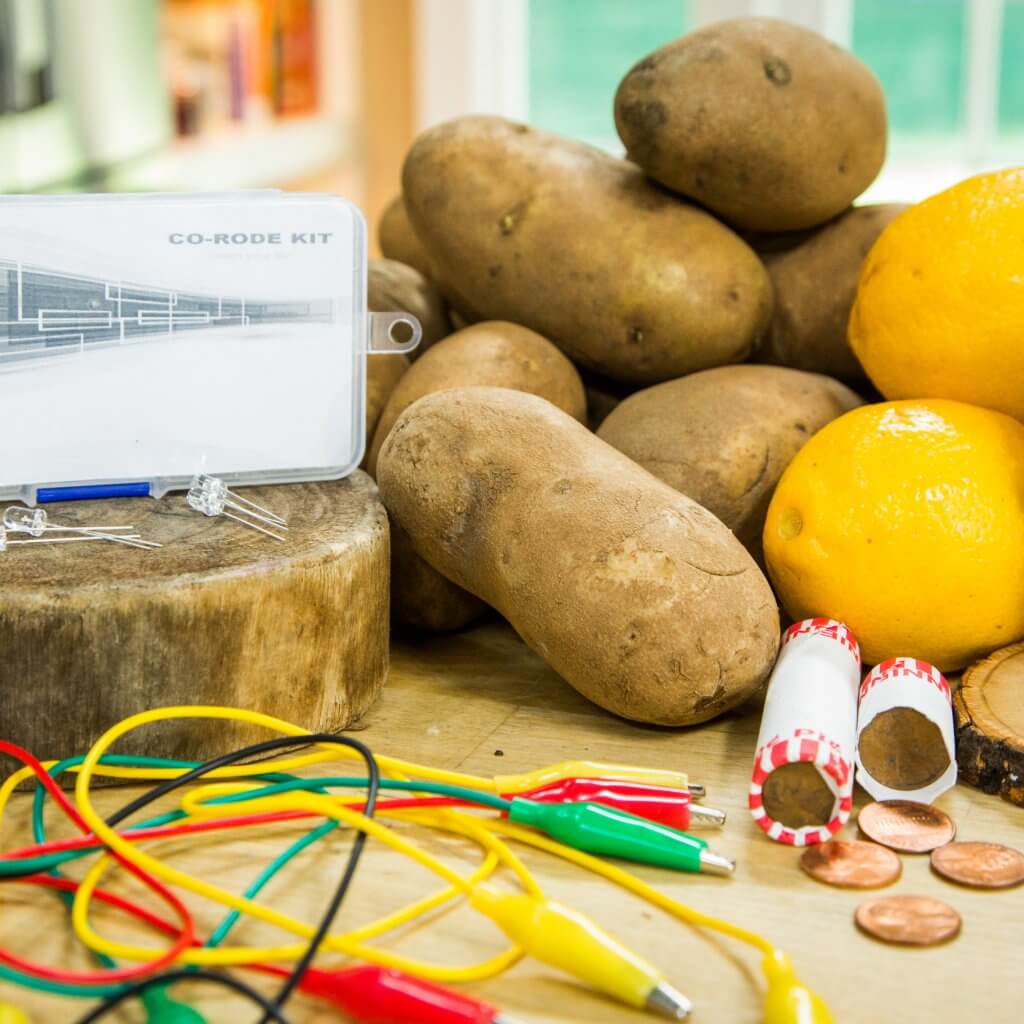
Potato battery
If you want some more electricity experiments, making a potato battery is a fantastic experiment to try out. You and your kid can make a battery out of potatoes in order to power a low voltage digital clock.
For this the experiment, the following materials will be necessary:
- Two potatoes
- Two galvanized nails
- Two pieces of heavy copper wire (make sure the pieces are short)
- Three alligator clips
- A low voltage digital clock
To begin, take the battery out of the digital clock and make sure you keep note of where the negative (-) and positive (+) points of the battery make contact with the clock inside the battery compartment. Then, you’re going want to number your potatoes one and two so that you can ensure your safely keeping track.
Next, put one nail into both potatoes. Then you’ll go head and insert one of your short pieces of copper wire into the potatoes, but make sure you put them as far away from the nail as possible. Next, take one alligator clip in order to connect the nail in potato number one to the positive side in the battery compartment of the clock.
Then, use another alligator to clip to connect the nail of potato number 2 to the negative side of the clock’s battery compartment. After that, you’ll use your third alligator clip to connect the nail in potato number one to the copper wire in potato number 2. From there you have your battery and you can just go ahead and turn on the clock.
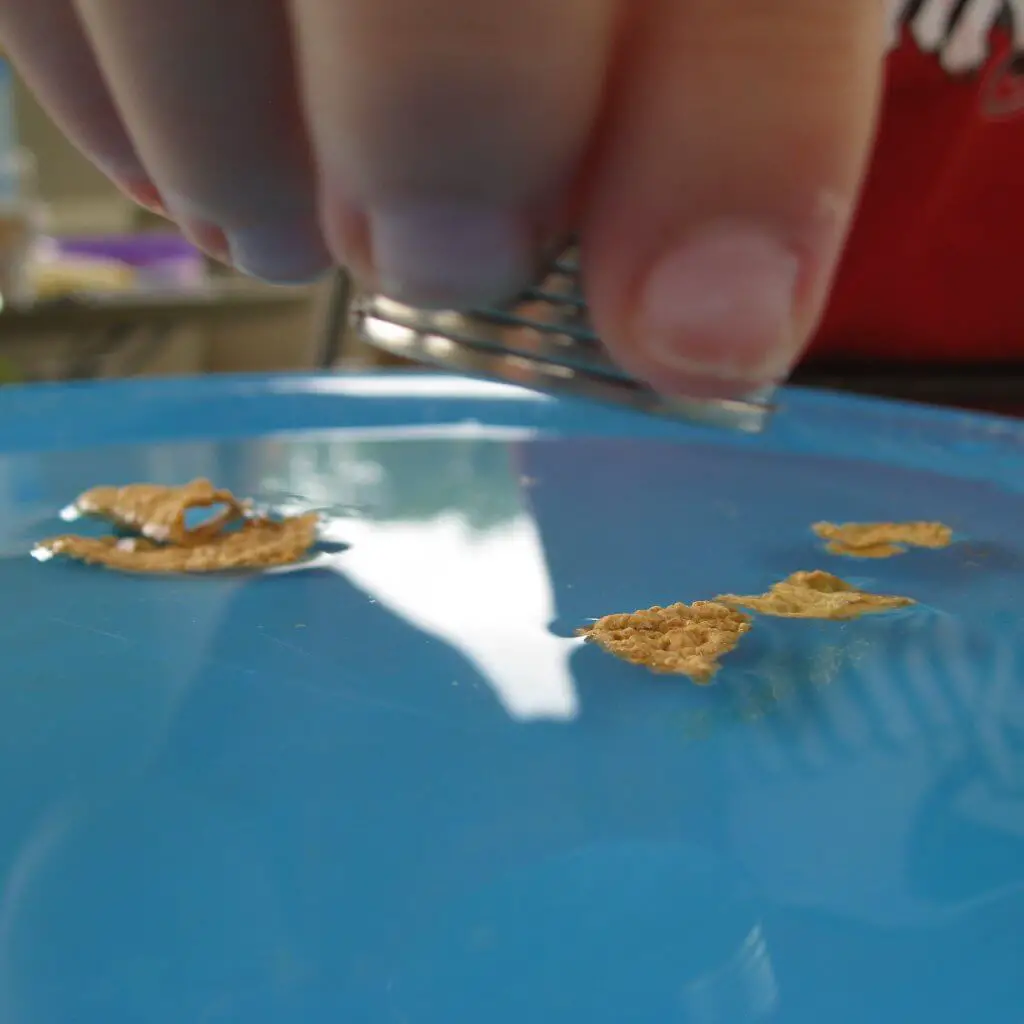
Magnetic cereal
Did you know you can make a sort of homemade magnet using cereal? With a little experimentation, the iron in cereal is actually able to attract the iron from a magnet.
To get the attraction started you’ll need the following items:
- Any cereal that contains iron
- A neodymium magnet
- Any clear plastic bottle
- Water
You’ll start by filling a third of the bottle with water and then put your cereal into the water. Next, just shake it up a bit and allow the cereal to dissolve and form into smaller pieces. If you can’t get the cereal to break up and dissolve right away then you can let the cereal soak overnight in order to let it soften.
Go ahead and place the magnet outside of the bottle to begin developing an attraction between the cereal and the iron of the magnet. Make sure you rotate the bottle so that you can get as much of the liquid to the points where the magnet is placed.
Once you slowly lift the magnet from the bottle, you’ll notice little pieces of iron from the magnet stuck on the bottle.
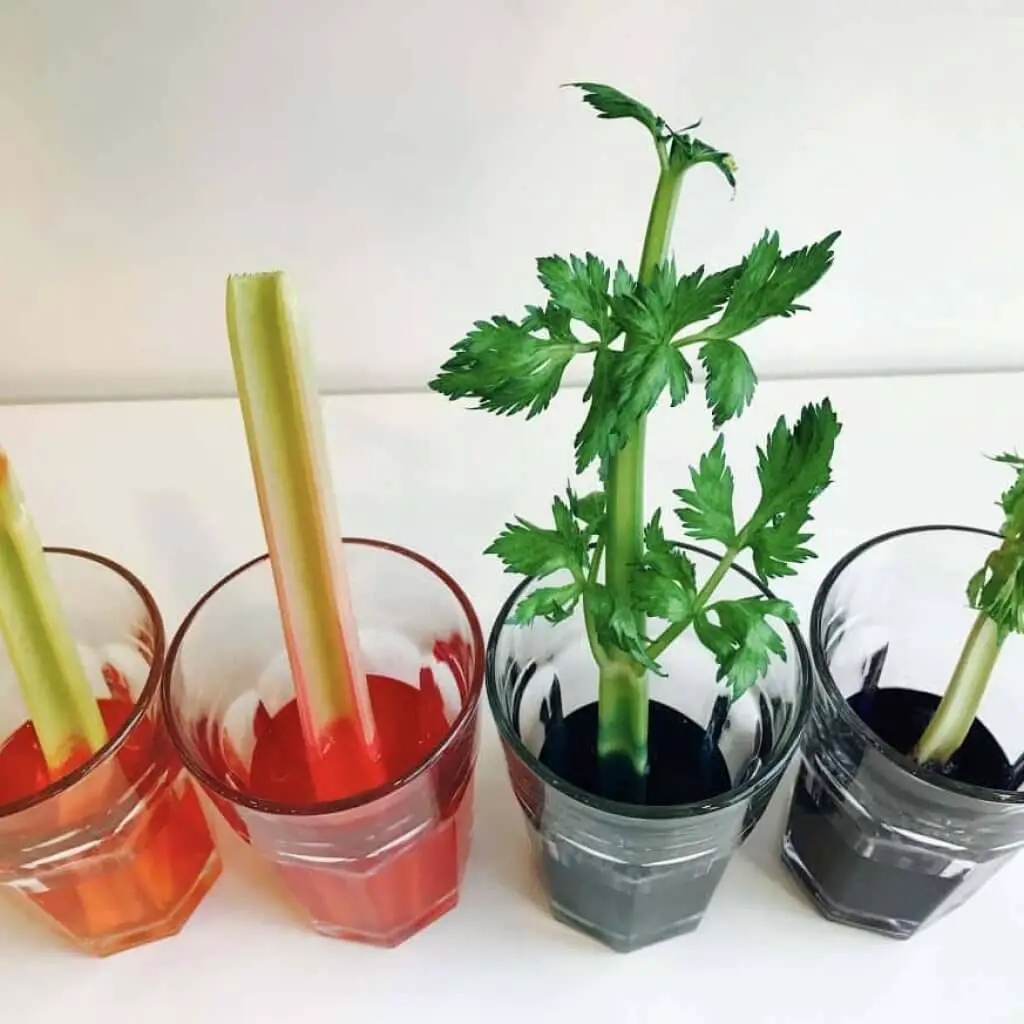
Dyed plants
This is a great one to teach your kids about the process of capillary action (the process that allows plants to “drink” water).
Here’s what you’re going to need:
- Three white flowers of your choice
- Food coloring (colored yellow, blue, red, and green)
- Four glasses of water
- A knife
Go ahead and add food coloring to your glasses of water (a color for each glass), then stick two of the flowers into two of the glasses (one flower per glass). You’ll then use the knife to go ahead and slit the stem of the remaining third flower, and put each split half of the stem into your remaining two glasses (one half of the split stem per glass).
Leave the glasses out of any indoor sunlight for an hour. When you come back you’ll have a colorful bouquet in your home since the flowers “drank” the food colored water which in turn changed the appearance of the flowers.
The two flowers without the split stems will have a single color for each, and the flower that you split will have two colors that are divided right down the middle of the flower pedals; this gives you and your kid a bit more of an in-depth way to understand just how powerful the simple process of capillary action really is.
Invisible licorice
You can teach your kid about light and perspective by making invisible licorice. In this instance, you get the fun of mixing a science experiment with a sort of magic trick. The following items will be needed:
Licorice (really you could also do this with a pen or pencil, but licorice is just more fun) Drinking glass that’s tall and skinny
A cooking oil like vegetable or olive oil.
Just pour the oil in the glass, and go ahead and stick the licorice after that. Try to get the licorice to lean up against the inside of the glass as much as you possibly can (you might have to do a little bending). Hold the licorice in place while slowly rotating the glass, and you and your kid should notice that the middle of the licorice has disappeared.
This optical illusion works pretty how much how you think it does. It’s just like how light bends in water (you’ve probably seen a similar trick just by putting a stick in a pond). Like water, oil also causes light to bend, but it does so even more than water. Oil is able to bend light to such a degree—that instance with this experiment/trick—the middle part of the licorice goes undetected by the naked eye, when the glass is viewed at specific angles.

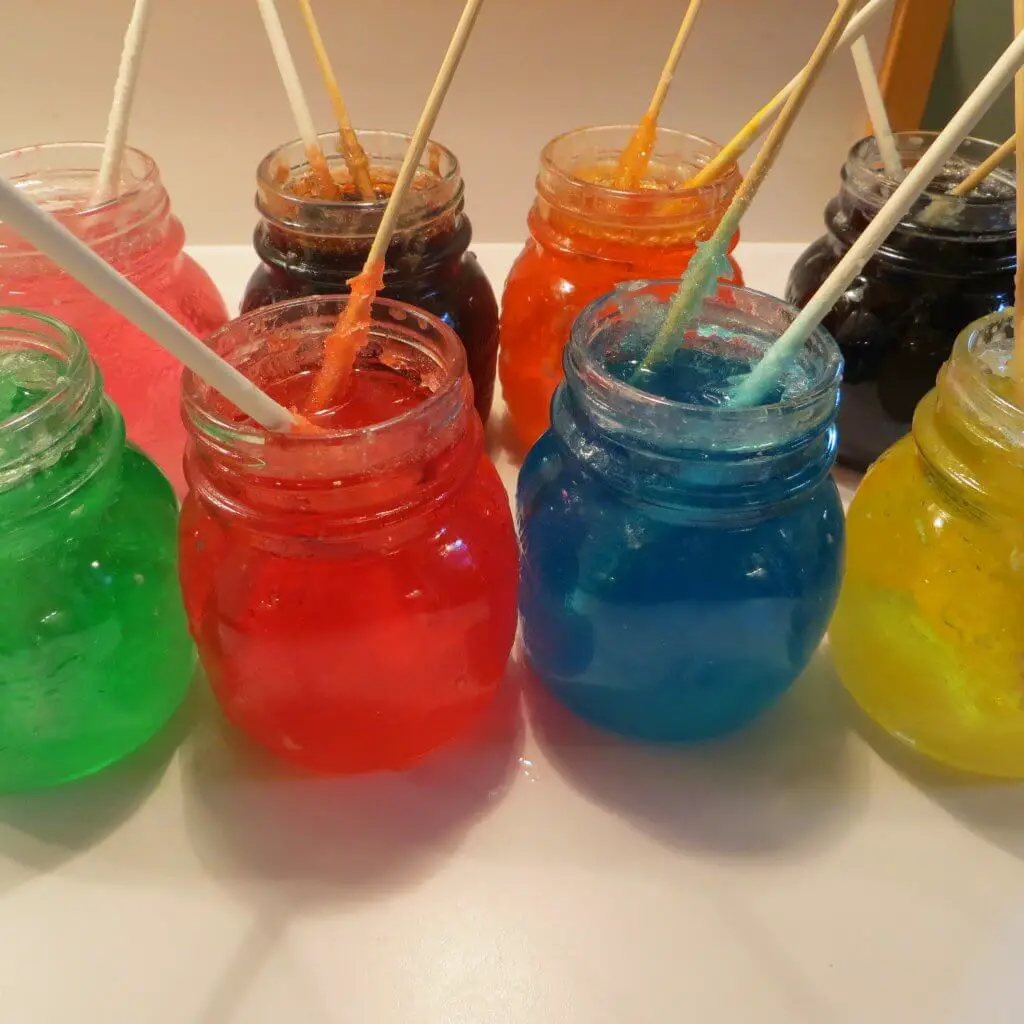
Rock candy
Here’s another science project that demonstrates the process of crystallization, while also giving you and your kid a tasty treat to enjoy. This project is a lot of fun, but you have to wait about 10 days before you actually have the candy (just be patient).
You’ll need the following:
- Glass jar
- Saucepan
- String made from cotton
- A candy thermometer
- A weight for hanging the string (such as a washer)
- A pencil in order to suspend the string in the jar
- Waxed paper
- 4 cups of sugar
- 4 cups of water
First, you’ll heat the water in the saucepan until it reaches the boiling point. Go ahead and pour the sugar into the water and stir until the sugar dissolves. Continue to stir until your mixture gets to a rolling boil. Then, go ahead and pour the water into a jar and cover the jar with the wax paper.
Next, you’ll want to take your string, and tie the weight on one end and then tie the pencil at the other end. You’ll need to then dip your string into your sugar solution, take it out, straighten it, and lay it out on the wax paper.
You’re going to have to let it dry for a few days (this allows seeds of crystals to form on the string once the water has evaporated). Make sure your string is roughly two-thirds as long as the depth of the jar.
Once the string is dry, you’ll then put the string in the jar of the sugar solution, and leave the string suspended and untouched for seven days (I know it’s a long time). After you’ve so patiently waited for a week, you’ll notice that larger and much more defined crystals have grown. Now, you have rock candy.
There’s so many interesting experiments you can do at home with your kid in order to learn about everything from the fascinating processes behind electricity, crystallization, light, and much more. Who knew you could turn your own home into your very own science lab? Next time you’re searching for a fun activity to do with your kid, go ahead and put on those lab coats and discover something new together. You get the chance to hang out with your child, while educating her in the process.